Showing posts with label gardening. Show all posts

Wednesday, September 26, 2012

A Quick Landscaping Update


We're making major progress this week on what I've just decided to call Project: Landscape This House For Crying Out Loud Because You've Lived in It for Five Years!

Let's recap what's been going on with PLTHFCOLBYLIIFFY to this point...

Earlier in the year, I enlisted the help of a local and very knowledgeable gardening consultant because I know next to nothing about horticulture.  Based on my longing for a cottage garden, the consultant drew up a landscaping plan that incorporates flowering shrubs like roses, hydrangeas, peonies, and gardenias, as well as evergreen shrubs for year-round color, and space for perennial flowers. 

The next major step was completed in June when the beds were installed.  Here's one of the beds as it was just before being dug.


My husband and I enjoy DIY projects, but decided it was worth it to hire a crew to come in and knock out the beds in a day. It most definitely was.

Then it took about three months for me to finally put down landscaping fabric to keep weeds at bay while we waited to plant in the fall.   Here's the same bed from above, covered in landscape fabric, and waiting for plants.


With fall finally here, my husband and I went to the State Farmers Market in Raleigh last Friday to purchase the majority of the landscaping plants.

A friend had serendipitously told me in August about a wholesale nursery that sells to the public at the State Farmers Market.  I visited the nursery's Web site and it turned out they could supply the great majority of the plants called for in the landscaping plan.  What good fortune!  And the best part?  All of their 3-gallon plants are just $10 each.


So where we are now is that the plants are going in the ground this week!  And yes, we're a bit messy when we work.


Once the beds are mulched, I'll be back with more details on the plants we've used.  But I am already so happy with the this pretty little Ducher rose and the gorgeous-smelling gardenias.


In the meantime, I'd love to hear from you more experienced gardeners about perennial flowers you like.   I live in zone 7 and have already planted coreopsis, daisies, sedum, and penstemon.  I really like coneflowers and zinnias, but beyond that, I'm all ears for suggestions!

Monday, September 3, 2012

Time Keeps on Slipping...


People, I'm freaking out that it's already September!   Anybody else feeling the same way?

Don't get me wrong, I'm so very glad September's here and that fall is soon to come.  I'm practically lusting for an autumn breeze and a change of color in the leaves.  I even had to stop and photo this leaf last week when I was mowing the yard, the colors of it thrilled me so much.


In fact, in celebration of autumn's approach, I've been making batches of Mulled Cider and Pumpkin Pie candles for wholesale orders and the Harmony Farm Candles Etsy shop. Sniff either of these and I guarantee you'll be yearning to dig out a cozy sweater, feel a nip in the air, and hold a warm mug in yours hand. :)

Mulled Cider Soy Wax Candle
Pumpkin Pie Soy Wax Candle


But I swear, I blinked and the month of August came and went.

Really, I shouldn't be surprised the month went by so quickly. We spent a week at the beach with my husband's family, then celebrated both of my parents' birthdays upon returning home.

School also started last week and my one and only baby is now a kindergartener!


Though neither he nor I boo-hoo'd, or did anything even remotely close to that, on the first day, it surprises me how seeing him off the subsequent mornings in the car rider line snags a part of my heart. Watching him walk into the building after a perfunctory adieu (Me: "Buddy, I love you! Have a good day!" Him: "Gotta go, Mom!"), just one little person in a sea of many, makes me want to snatch him back and keep him for myself just a little while longer.   But he's happy in elementary school, doesn't seem to have missed a beat in the transition, and so goes the growing up of a child.

With the new-found free time that comes with not having a kid at home for seven hours a day, I've been slaving in the perpetual and disgusting heat and humidity to finish prepping the beds around the house for landscaping in the coming weeks.  We had beds installed in early June, and it only took me two months to put down the landscape fabric (after weeding the beds close to half a dozen times--you'd think I'd learn!)


P.S.--Did you know they make these magical things called landscape staples?

via

You insert them through the landscape fabric and into the ground, thus securing said landscape fabric in place. Well, I didn't the first time I laid out and cut the landscape fabric.  Only after laying tree limbs, random garden instruments, chicken-feeders-cum-flower-planters, and old fence posts (while thinking "there must be a better way!"), did I realize these babies existed.  But of course, this realization also only occurred after a windstorm blew away and/or twisted the fabric so I essentially had to repeat all my original work before I could use the staples. 

Moving on...

So, the plan is to get most of the shrubbery by next weekend from a local wholesale nursery, and in the meantime, order a few roses by mail from the Antique Rose Emporium.  Once the plants are here, we (hopefully my husband) will lay a drip irrigation system, I'll get the plants in the ground, mulch, and come spring there will be much loveliness happening.


I must be a glutton for manual labor because I also spent a good bit of time in the last part of August cleaning out the remains of the summer garden and readying the beds for a fall/winter garden.

The beds that currently house seedlings are spiffed up with this kitschy wire edging that makes me want to do jumpy claps every time I see it. I'm totally thinking I should paint the raised beds...too much?


Though this embellishment is definitely for looks, it also serves a purpose as I try to keep the bloody-free-ranging-fowl-that-think-they-can-eat-whatever-they-please-and-poop-wherever-they-want chickens out of the garden beds.

They totally munched the Romaine lettuce, spinach, and broccoli seedlings to nubbins a few days back.  Needless to say, the hens are locked in their pen until further notice and I'm ignoring the shade they keep throwing my way.

Someone please tell me the poor little seedlings will survive such ravaging? This one was originally three times this size!

So, that's where I am in the first week of September.  After all the recent gardening, I'm looking forward this week to thinking about (nay, even doing, perhaps?) some fall crafts and decorating.  And if this heat ever breaks, there are several pieces of furniture calling my name, just begging to be refreshed.

What are your plans in the coming weeks?

Happy Labor Day!

Sunday, July 8, 2012

The July Garden Update and Lessons Already Learned


Wow, this heat wave we've been having will seriously make you not want to do anything besides lay around and catch up on past seasons of Sons of Anarchy and The Office.

It's been 100+ degrees here for what feels like weeks.  A cool front's supposed to move in tonight and drop the temps into the low 90s tomorrow, then into the 80s the rest of the week.   Please, please, please let that happen!

Anyway, it's about time for another garden update.   And look what the garden is yielding!


All this heat has necessitated watering every evening, but the garden's doing well nonetheless.

Well, I should say parts of the garden are doing well.

First, the good news.

There are lots of green beans coming in, as evidenced by the photo above.  I beer-battered and fried the first harvest and good lawd was that a delicious way to enjoy fresh green beans.  We scarfed all those fried green beans, so alas, no photo.  But I used this Food Network recipe and Newcastle Brown Ale to make a simple and delicious batter.  What green beans we don't eat will be frozen and put up. 

Also doing well are the cucumbers.  I planted four pickling cucumber seedlings in May and when we returned from our trip to Florida in mid-June, they had grown like bananas!


I'm harvesting an average of 4-5 cucumbers a day and have been making copious amounts of refrigerator dill pickles.  (There's dill in the garden too, so it's quite convenient to clip some of that while I'm out picking cukes!)  There are pickle spears, and chips, and the first batch will be ready to eat later this month. 


The heirloom cucumbers planted from seed are a little behind the seedling cukes, but growing well nonetheless and we've harvested quite a few of them as well.


Also growing nicely are the crookneck squash and zucchini, and there are several little watermelons that are thriving.  The tomatoes are fair--nothing's turned red yet, but there are quite a few green ones on the vine.


Not doing so well?

The two beds nearest to the woods.  They started off so promisingly, but have completely crapped out since mid-June.  Everything is stunted or dead at this point.  I need to just pull it all out and start planting for the fall here because they are a lost cause.


The corn is tasseled, but also a bit stunted.  Nevermind that most of it didn't come up, likely due to the chickens.

On the whole, these garden beds don't get as much sunlight as they ideally should because our yard is surrounded by mature woods.  I've been eyeing the side yard, observing how much sun it receives, and I'm thinking I will need to build some beds in that area for next season as it receives light earlier in the day, and continues to do so well into the late afternoon.

That means more work for me, but I'm thinking of minimizing the labor by trying the lasagna method to establish the beds. We shall see...

This little epiphany also leads to the next lesson if I want to increase how much food I grow: I absolutely must start seeds indoors next year.  I was very much behind the eight-ball on that this year, and most of the plants are maturing later because of my tardiness in planning the garden.

The final lesson I've learned is that if I want my chickens to free range--which I do because they're happier when not penned, plus I enjoy catching glimpses of them, and their eggs are more nutrient-laden when they're allowed to forage and spend time in the sunshine--that means I'm going to have to bite the bullet and put up a fence around the garden beds.

Chickens actually NOT in the beds for once...these three young hens were after a bug and running all over the place before I captured this photo

Besides thieving seeds, the twerps ladies also enjoy taking dirt baths in the garden beds. Even though I routinely chase them out, they inevitably return for the cooling relief of the dirt.  They've damaged a number of plants and also helped themselves to the leaves of many a seedling. So, next year, a fence will be in order.

Despite that negative-sounding end note, I will say, I'm truly pleased with how certain parts of the garden are doing.  It's quite a little miracle to know that most of this garden started with seeds sown directly in the soil--and now many of those seeds are lush, large plants giving my family food, albeit in small amounts.

"Like a big mountain, a small garden stimulates, restores, and delights us, 
just as it poses challenges, promotes mastery, provides exercise and relieves monotony."
- Winifred Gallagher


How does your garden grow this summer?


Sharing at:

Sunday, June 10, 2012

A Garden Update


The square foot garden I planted in April through very early May is alive and kicking!

Granted, not everything has come up in every square: I planted an entire bed of corn (50 squares) and as you'll see below, maybe a third of that corn came up.  I'm thinking the free-range hens had something to do with that...

However, I'm quite pleased with the way things are coming along!  Here are a few photos I took the first of the month of the garden in progress.


One of the first beds planted and it's full of peas, green beans, squash, zucchini, watermelon and canteloupe plants.

Another of the early beds: tomatoes, that started as seedlings, are in the far-left row.  I originally had one plant per square foot, then realized the plants would be too crowded.  So, I transplanted half of them to another bed and left one empty square between each tomato plant.  They've grown significantly in 6 weeks time!  Also in this bed are some tomato plants grown from seed, as well as more squash and cucumbers.

The pilfered corn bed.   I really ought to plant more corn (I had put in two kernels per square) but I think it's probably too late.  Will know next year to put chicken wire up around this bed!

Happy green beans and peas in this bed

And look, actual pea pods!

This is one of the more recently planted beds.  As you can tell, I didn't mark off square foot blocks.  This is about 4' by 4' and in it is four bell pepper seedlings and four pickling cucumber plants. 

Though this doesn't pertain to the vegetable garden, we're also finally starting work on landscaping around the house, too!

Here are the beds marked and ready to be tilled and amended with a topsoil compost mix.  The beds will eventually be filled with a cottage garden of shrubbery, flowering bushes, and and flowering perennials and annuals.

The side of the house

Continuing around the wrap-around porch.  The beds have curvy perimeters and are meant to have a relaxed form.

And the mondo bed--it extends a good 12 feet from the house at the furthest point--which will help to disguise the heating and a/c unit at the side.  The two windows on the front of the house look into the master bedroom and the plan is to have a variety of flowering bushes here.

What's growing in your yard or garden right now?

-Erin

Sharing at:

Tuesday, April 24, 2012

More Sq. Ft. Gardening: What I Planted and Resources for Your Own Garden


Before I finish the square foot gardening post I started last week, I want to take a quick minute to remember Lucille, seen here on the blog last summer.


She died today from injuries sustained in a possum attack last night.  Poor, sweet girl.  She's the only hen we've lost to a predator in the nearly two years we've kept chickens.  My husband--ever the avenger--made swiss cheese out of dispatched the possum so our other ladies won't be in any further danger.

Such is life in the country.

R.I.P., Lu. :(

----------------

So, back to square foot gardening.  Last week, I cleaned out two raised beds in our garden, added vermiculite to the preexisting compost/topsoil mix, and created grids with baling twine.


I then planted 10 heirloom tomato seedlings (4 Pink Brandywine and 6 Cherokee Purple) that my mom gave me.


In the rest of the squares of the two beds, my little helper and I planted these seeds:

  • Yellow Crookneck Summer Squash
  • Jalapeno Peppers
  • Black Beauty Zucchini
  • Cocozelle Zucchini
  • Sugar Snap Peas
  • Spacemaster Cucumbers
  • Blue Lake Bush Beans
  • Sugar Baby Watermelons
  • Detroit Dark Red Beets
  • Hearts of Gold Canteloupe
  • Chadwick Cherry Tomatoes
  • Chives

Planting peas


One more seed to plant in that square!

For information on how many seeds to plant per square, check out Plant Spacing for a Square Foot Garden. All New Square Foot Gardening does not have an exhaustive list of plant types, so this Web site was a great additional resource.

And I also found this spreadsheet on companion planting quite helpful as I laid out the grids and determined where to place seeds.

So that I don't forget anything, as I'm very prone to do, I'm keeping a notebook with diagrams of each bed, noting what and how many seeds were planted in each square, and when they were planted. 

Speaking of the seeds, all were from Southern Exposure Seed Exchange of Mineral, VA and Sow True Seed of Asheville, NC.  Most are organic and heirloom varieties native to the Southeast U.S.  Just trying to keep it local/regional!


If you're looking for vermiculite, it can be hard to come by as it's not generally carried in big box stores. I found this handy-dandy spreadsheet on My Square Foot Gardening that lists retailers by state.  For folks in North Carolina, Fifth Season Gardening (locations in Carrboro, Charlotte, Greensboro, and Raleigh) carries vermiculite, as do a few other specialty gardening businesses in eastern and western NC.

I'll be cleaning out the mustard greens this week, and converting those beds to sq. ft. beds.  I need to pick up some corn and okra seeds, and probably a few more varieties of herbs, to add some diversity to the garden. And with all the rain we've had lately, hopefully we'll be seeing some sprouts in the coming weeks!

-Erin


Sharing at:


{Primp} 
 
 
Momma Hens Coop

Thursday, April 19, 2012

Square Foot Gardening: The Work-With-What-You-Have Edition

Spring arrived early here, much like in the rest of the country, and I've had gardening on my mind ever since!

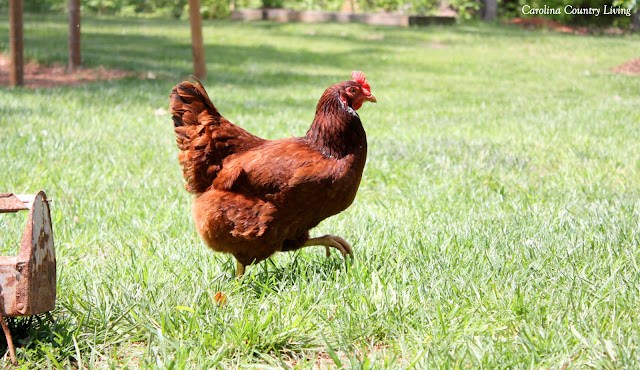
We still have lettuce, spinach, mustard greens (ick--can't stand 'em!), onions, and garlic in the raised beds in our backyard leftover from fall plantings.  And until earlier this week, we also had two beds full of kale, which had bolted earlier in the month.


My husband usually takes the lead on our garden, but this year he said he just wasn't feeling it, so since I most certainly want a summer garden, it was up to me to get that ball rolling!

Jason takes a more relaxed approach to planting the garden, usually broadcasting seeds into the beds, waiting to see what comes up, then thinning and tending to the plants.

Well, I needed a bit more structure--or more like someone telling me what do--so I read Mel Bartholomew's All New Square Foot Gardening.  I quickly realized how simple, straightforward, and logical the system is, and decided that's how I'd plant and grow our summer garden.

Now, the basic tenets of SFG are:
-forgetting all you've been taught about planting gardens in rows--that systems works for producing food on a very large scale; home gardens needn't take up nearly as much space
-building raised beds in dimensions of 4 feet (ex: 4'x4' {the ideal} or 4'x8', etc.)
-filling the beds with a mix of compost, top soil, and vermiculite to minimize weeds and ensure quality soil
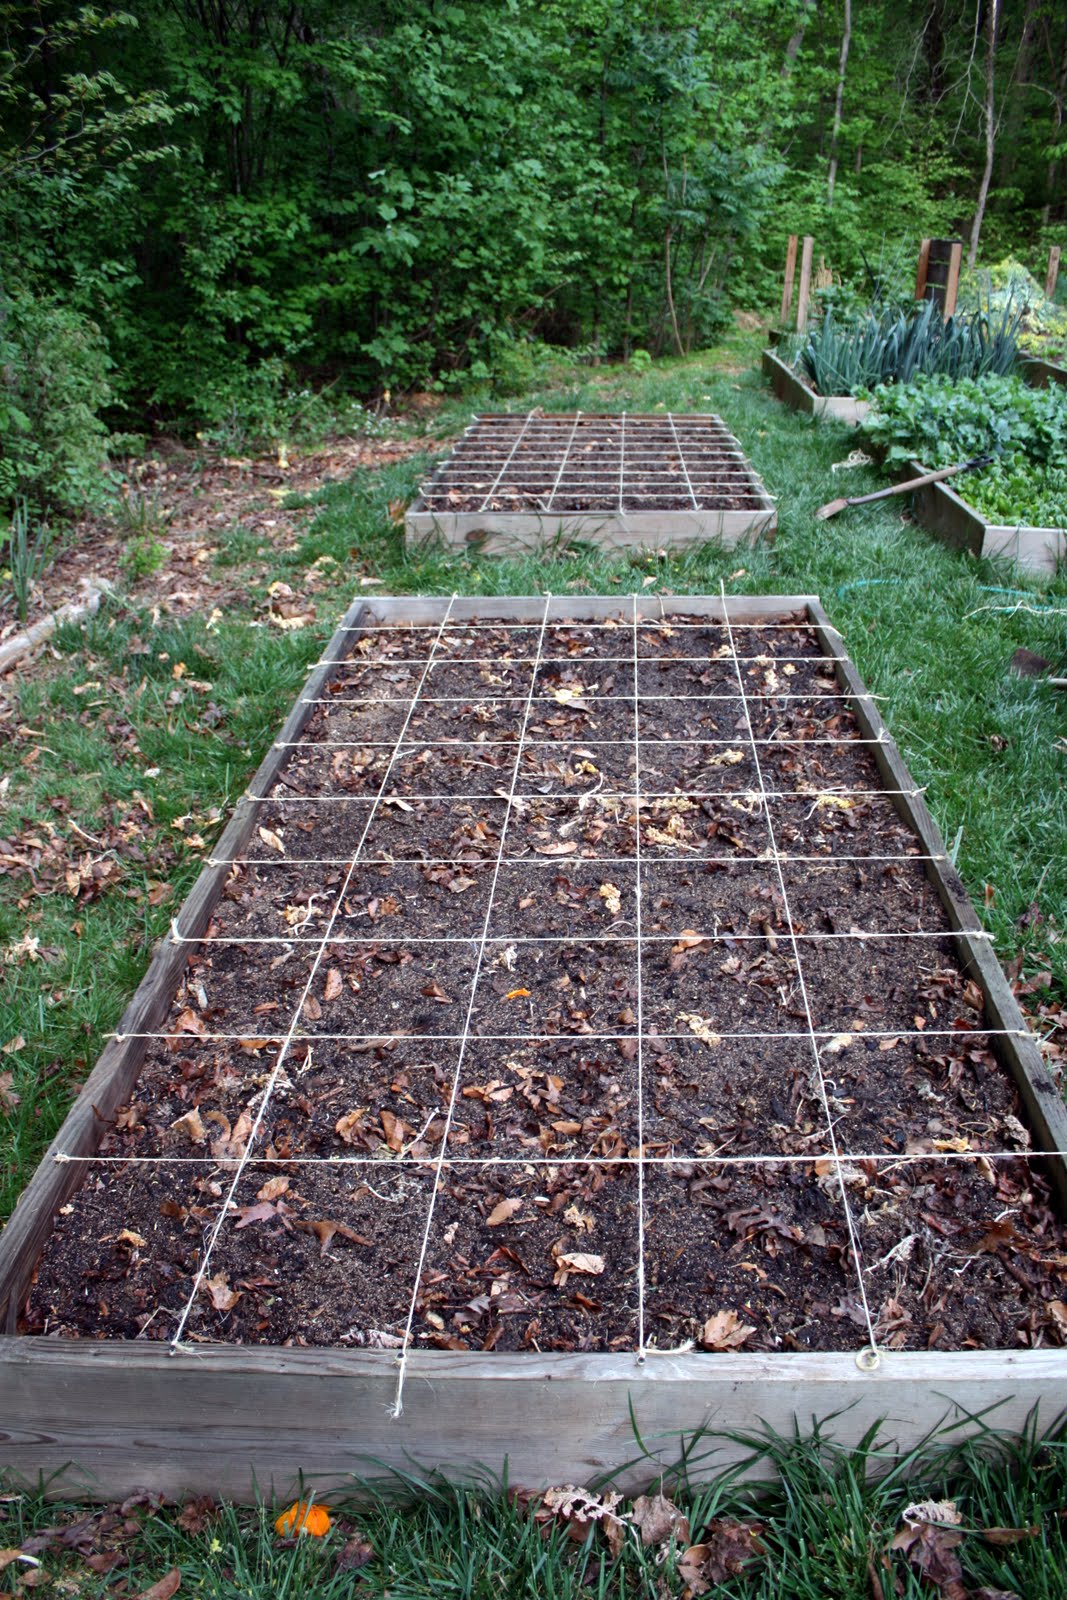
-making grids to go on top of the beds to delineate each square foot
-planting seeds and/or seedlings densely in each square foot block
-maximizing the amount of food grown in a small area of square footage

Mel gives guidelines on how many plants to grow in a given square foot, based on the mature plant size.  For instance, a single tomato plant encompasses 1 sq. ft., while 9 beets can be planted in the same amount of space.

He also states that by using the SFG system, one adult can harvest enough food from three 4'x4' beds (48 sq. ft.) to eat a salad and have dinner vegetables every day of the growing season, plus have enough extra produce to preserve and put up as well.  Pretty impressive, huh? 
 
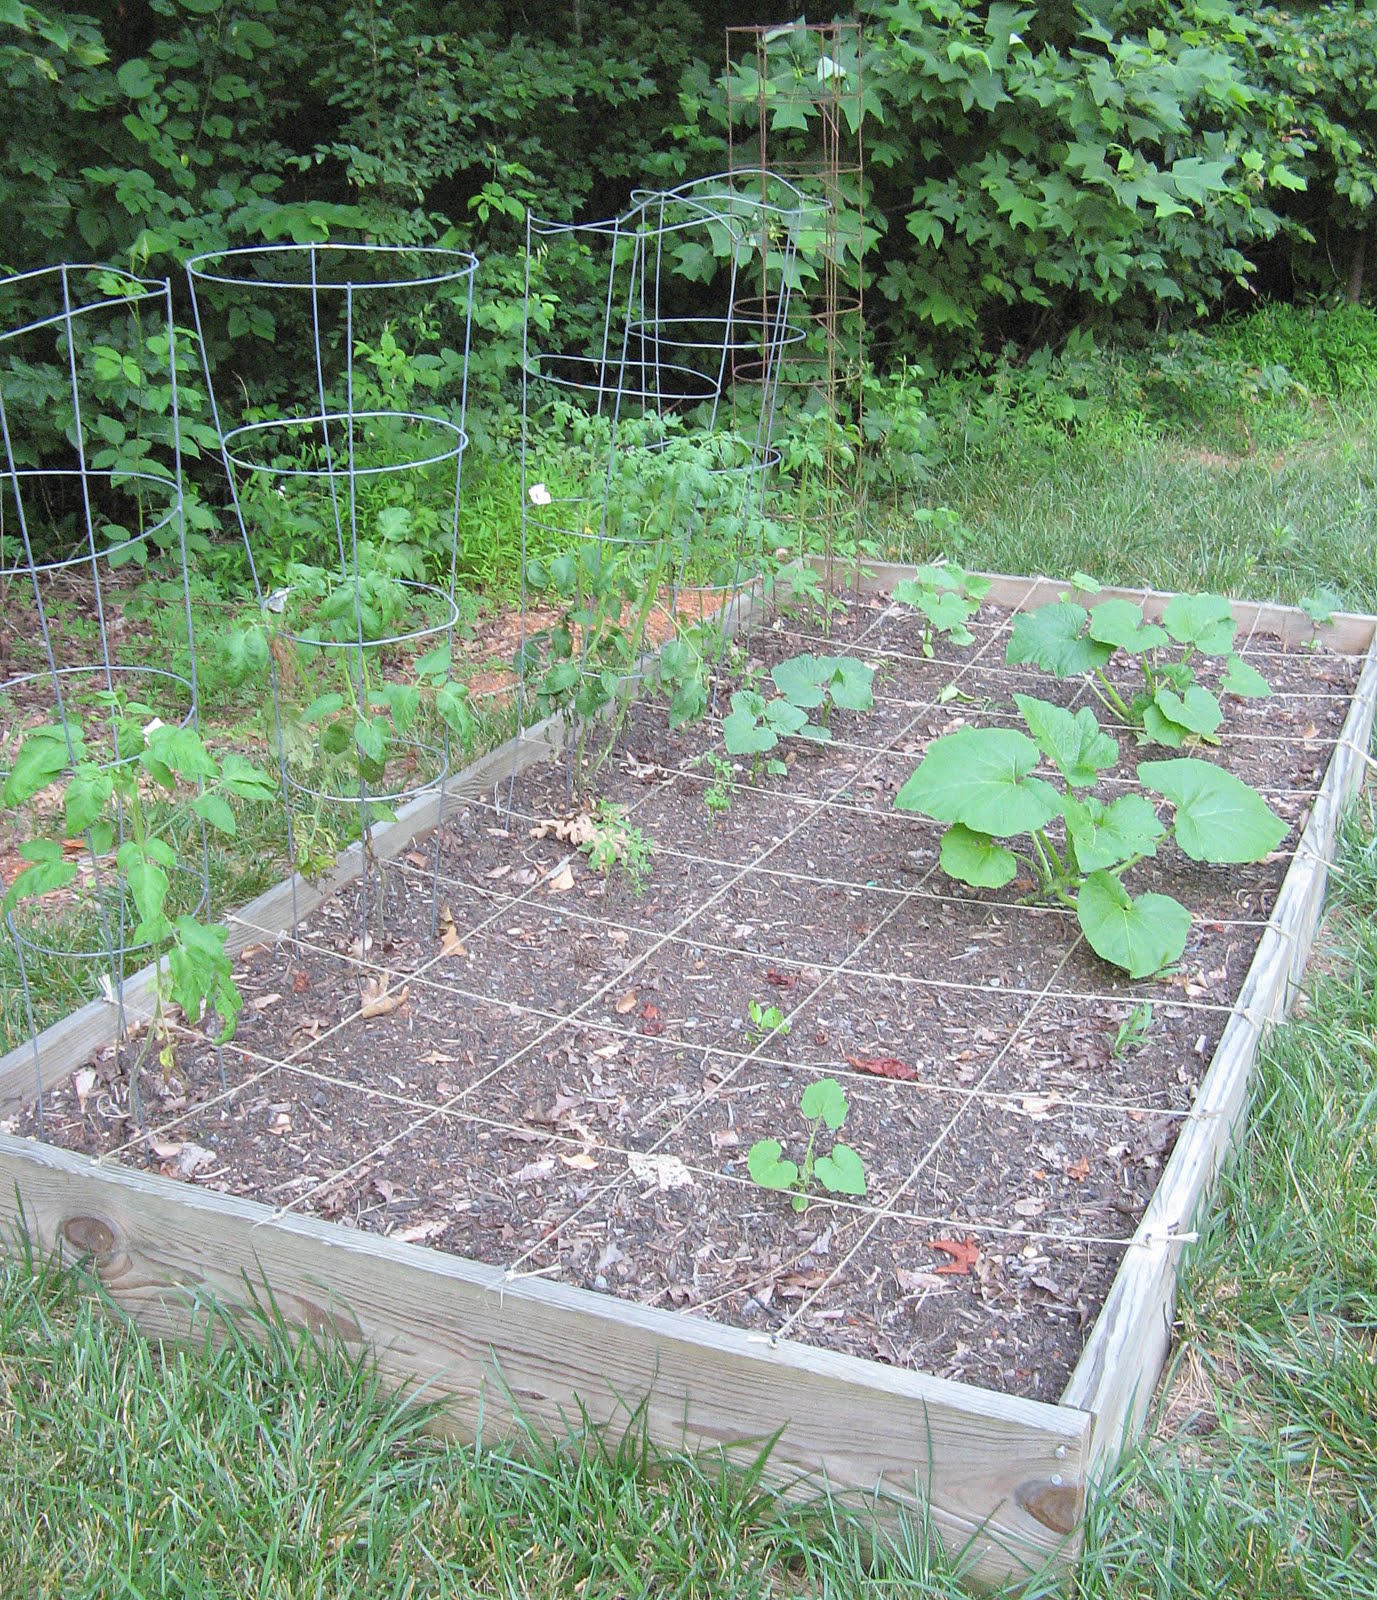
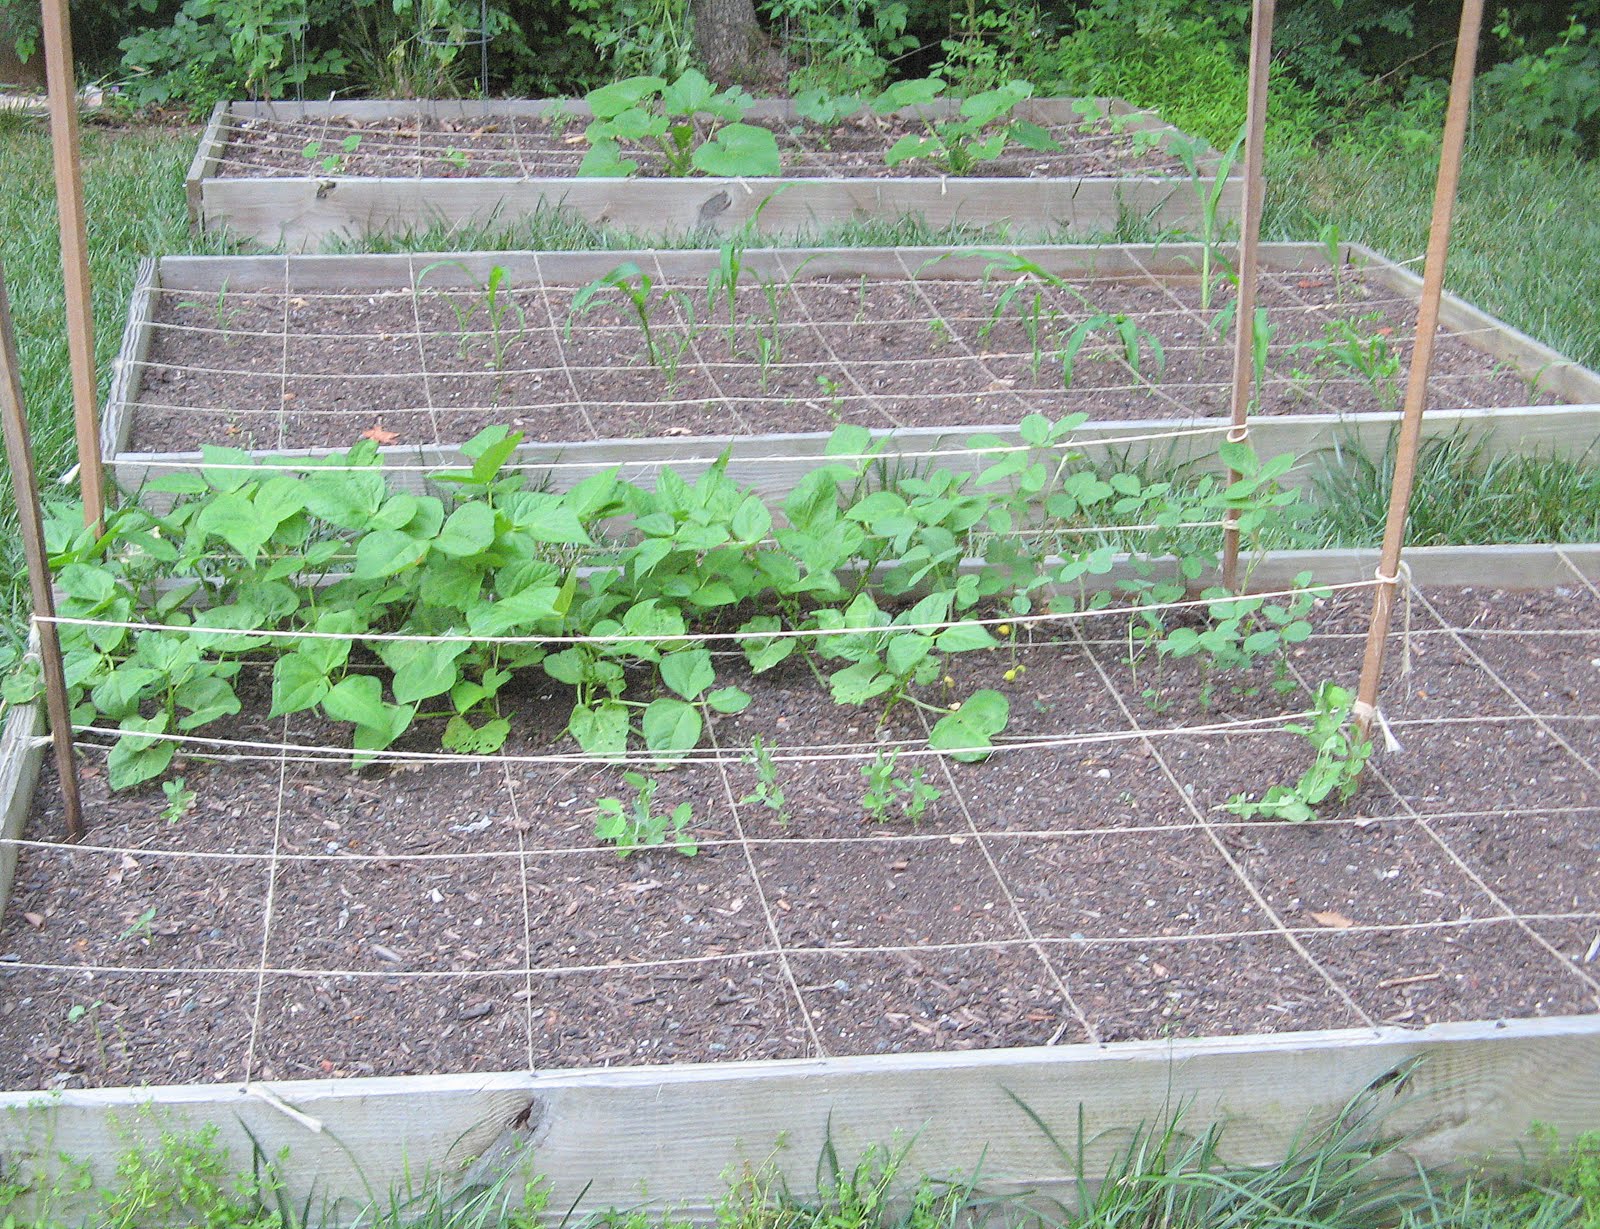
Our large beds--of which there are 8--are 5'x10' and constructed of 2x12s, so they were workable enough for the SFG system. 

Since building them in 2010, we originally filled them with a compost/topsoil mix, and then amended the beds with more of the same mix last year, plus leaves, grass clippings, and some horse manure compost from a neighbor.

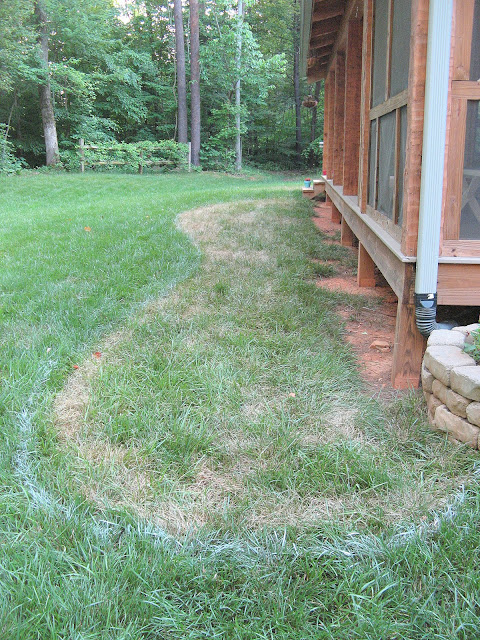
For this project, I decided to start small(ish) as Mel recommends and convert the two beds of bolted kale to square foot garden beds.  As the spinach and lettuces and greens wilt with the heat, I'll clean out those beds and convert some of them to the SFG system.  I may leave a few beds alone and use them for more sprawling plants like watermelon and pumpkins since we have the space, though you can technically grow them semi-vertically with the SFG system!

Anway, here's one of the beds of kale.


I ripped all that out:


Took a 4 cu. ft. bag of vermiculite:


  And emptied the contents into the bed and worked it into the soil:

The vermiculite prevents the soil from compacting and allows for better drainage


Now, the official way to do the SFG grid is to use wood lathe and make a permanent grid to lay on top of the raised bed.  After looking into several options at the local home improvement stores, we'd either have to spend a bundle on wood lathe long enough to span the 10' beds, or buy a table saw and rip 2x4s into thin strips of lathe, which isn't exactly the safest thing to do.

(This is where if you make your beds the recommended 4'x4' dimension, you can get lathe in 4' lengths for a cheap price.  Plus, a 4'x4' bed is easy for most people to reach in from all sides--another reason why Mel recommends those magic dimensions.)

Anyway, in the name of thrift (and instant gratification), I went against Mel's advice of building the wood grids. I already had 5,000 feet of baling twine and plenty of screws on hand.  And even if I have to replace the twine next year, I figure I'd rather use what I already have first than spend any money.   Plus, I could make a grid of twine without any assistance and get it done quickly.

So I marked off each foot around the perimeters of the beds and placed the screws: 


Then I took lengths of twine and tied them off, first along the 10 ft. lengths:


And then across:

The OCD/anal retentive part of me is totally loving all those neat little grids!

And tah-dah, Square Foot Gardening beds!  

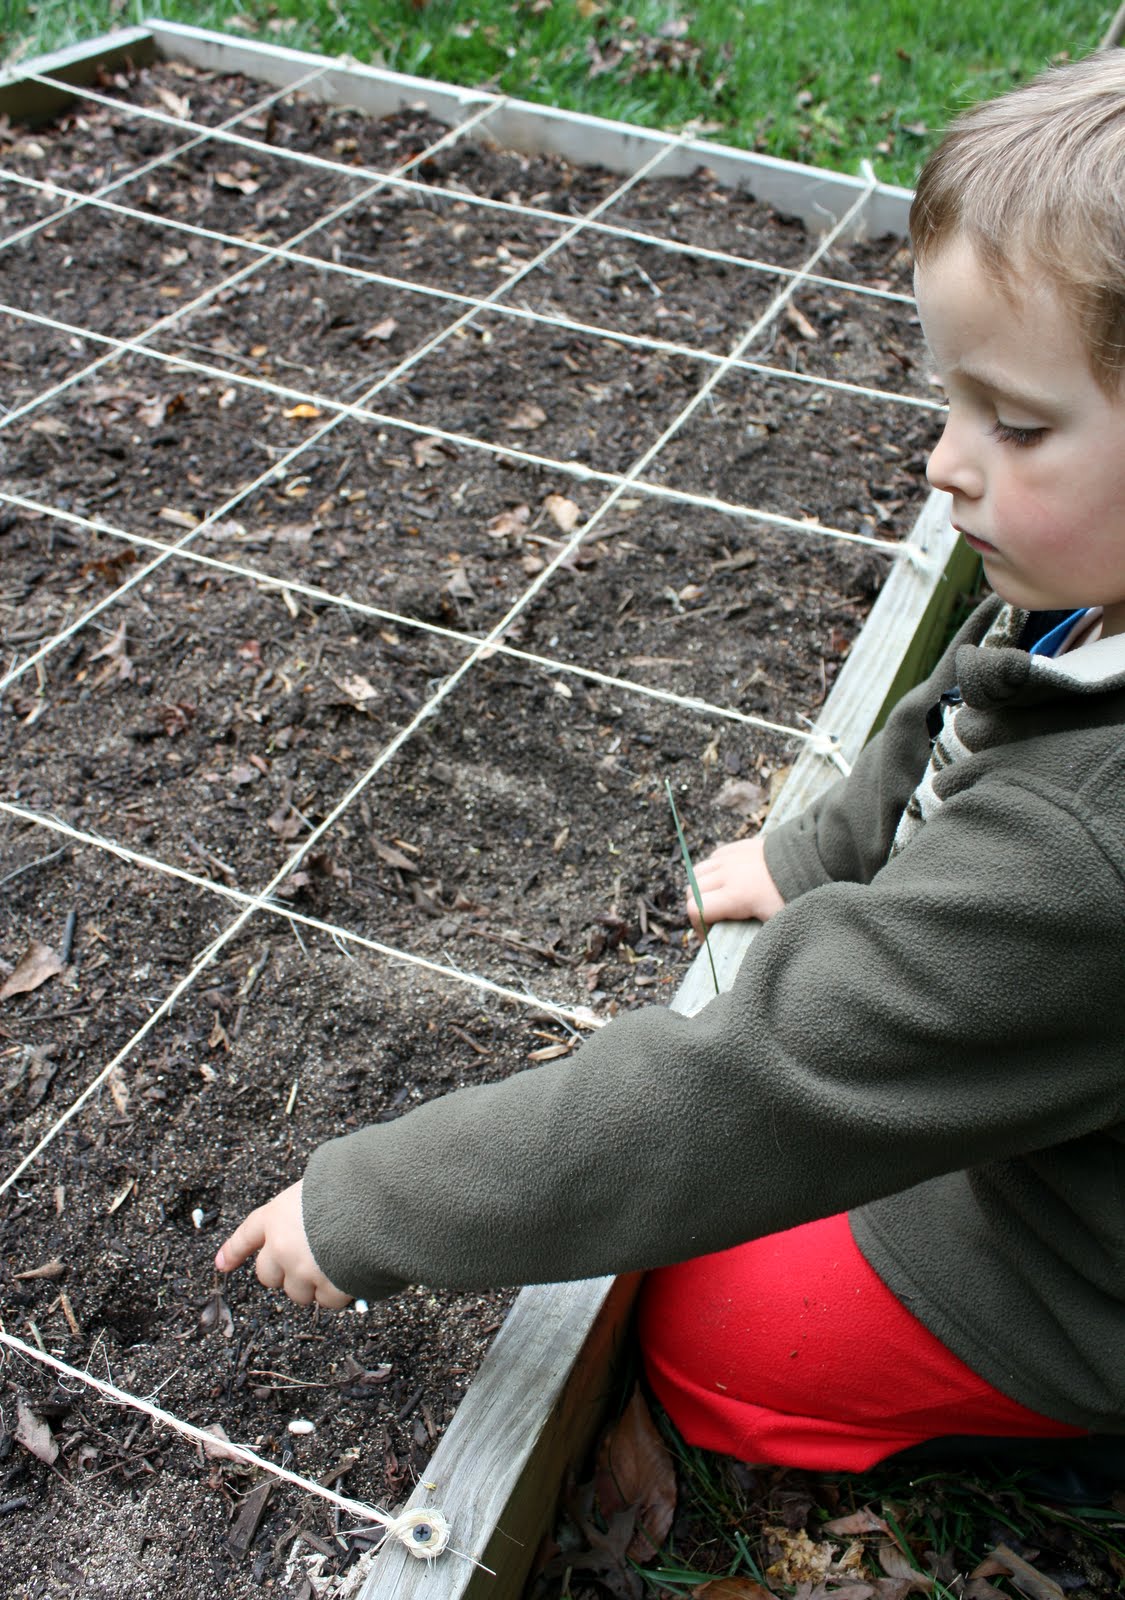
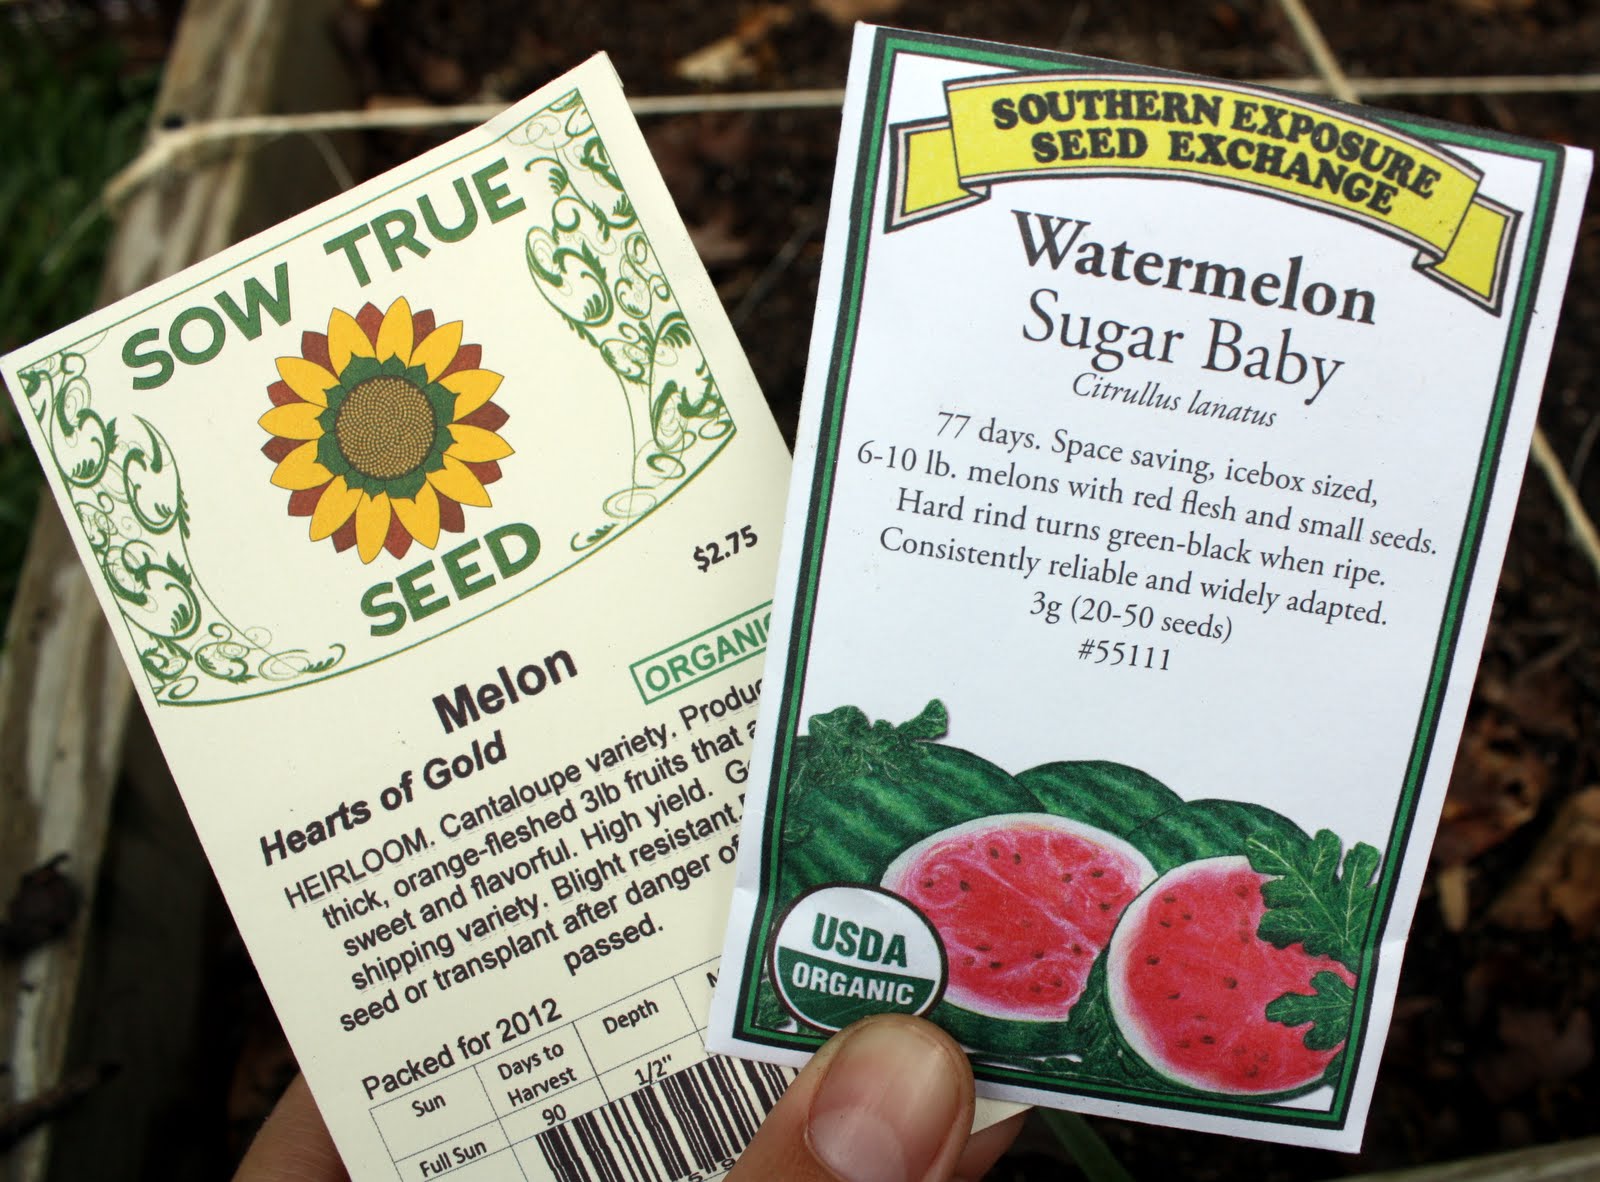
My son and I planted the beds today, but it's dinner time now so I'll be back in the next few days to give a quick rundown of what we've planted so far.

Do you use the SFG method?  Have you been working in your garden yet?  What have you planted?

-Erin